Whether you’ve only dipped your toe into the world of voice over, or have had loads of experience, an at-home voice over studio is a massive advantage for any voice over artist. But building your own studio? That can feel like a very daunting task. While there are lots of elements to consider, most homes will have a suitable space to turn into the recording studio of your dreams (Well, maybe not of your dreams . . . but at least a functioning recording space)! If you’re feeling lost on where to start, this guide will cover all the basics, from choosing the correct recording space to selecting your equipment.
CHOOSING YOUR SPACE
Possibly the most important component of building your studio is choosing the correct space. When recording, it’s very important to minimize external sounds and create a space that is comfortable to record in for hours. Professional voice over artists who are making a regular income from voiceover work might choose to invest in a sound booth, however this can be a very expensive investment. For newcomers to the voiceover world, there are lots of ways to transform existing spaces in your home into a suitable recording space! Basements, closets, or under the stairs are all popular choices for make-shift studios.
Whatever space you choose, it must provide good acoustics – no amount of fancy equipment can make up for poor acoustics. So, how can you tell if a space will have good acoustics?
- Walls: Any walls that have absorbent materials on them already are excellent options. The more barren the walls, the more they will reflect sound. If all your wall spaces are reflective, not to worry! We will chat more about soundproofing below.
- Dimensions: The most ideal space would be a room with angular ceiling and walls to lessen the reflection of sound. If you don’t have an angular space, the less square the space is, the better.
- Location, location, location – Is the studio space away from noisy household appliances? Does the location share a wall with a space that is frequently used like a bathroom or kitchen? Are you facing a busy road with lots of traffic or noisy neighbors? In general, the farther away you can be from external noise, the better the recording space will be.
- Power source: Recording sessions can take lots of time, so it’s important to have a way to power your equipment. This is a very important aspect to consider if you’re looking at a closet as your recording space. Closets can be amazing recording spaces since the clothes absorb so much sound, but often they don’t come with a convenient place to plug in!
OPTIMIZING THE SPACE
Most spaces will not be perfect for recording. To optimize your studio space, there are a few cost-effective ways to improve the acoustics of the room.
1. Deaden the room with absorbent materials. Using materials that you already own such as a couch, area rug, curtains, and bookshelves are all great ways to absorb sound. You can also purchase acoustic foam or other acoustic diffusers to help absorb the sound. If one surface is particularly reflective, no worries! You just need to make sure the surface opposite is absorbent. For example, if you have a very reflective ceiling, put down a thick rug to balance it out. Think of the frequencies. The higher the pitch, the easier it is to soundproof against. Lower frequencies can be much trickier to deal with. Sealing off your space is a good way to limit these frequencies, such as shutting windows and doors, but be sure to have some ventilation in the room!
2. Placement of the microphone – Ideally, the microphone should be placed away from the center of the room. The closer the microphone is to the center, the more ambient noises will be picked up. By aiming the mic near a wall or corner with lots of absorbent materials directly behind the mic, you will reduce the amount of reflected sounds.
EQUIPMENT, INTERFACE, & SOFTWARE
After you’ve chosen your recording space, the next step is to choose your equipment. This does not need to break the bank! Especially if you are just getting started in your voice over career, start with the basics of what you need and build out your dream voice over studio as you gain more jobs in the field. A lot of the equipment voice over artists choose comes down to personal preference and budget. Create a realistic budget for yourself, assess your studio needs, and then take a look at some of the options below.
Equipment
Microphone
A microphone is a very personal choice for every voice over artist. The type of mic that will work best for your voice and your budget will vary person to person, but there are a few key aspects to keep in mind when researching for your mic:
- Diaphragm size – mics with large diaphragms are best for picking up lower frequency sounds (bass or deeper voices) and small diaphragm or small capsule mics will pick up higher frequencies (treble or higher pitched voices). Generally, large diaphragm microphones are best for recording voice over work.
- Directionality – also known as polarity, this will determine how sensitive the mic is to ambient sounds. A cardioid mic picks up the sound directly and is the best type of directionality for voice over work.
- USB vs Analog – With an analog microphone, you will need to buy an interface to connect the microphone to your computer for recording. With a USB mic, the interface is built into the microphone and can simply plug directly into your computer. However, an analog microphone with an interface will always produce a better audio quality. There is a debate as to whether or not the difference in audio quality is noticeable on a recording, however the biggest advantage to a USB mic is portability and a lower price point.
If you’re stuck on where to start, here are a few of the most popular mics to explore:
- Audio-Technica AT2020 (or the USB model) – great budget microphone setup
- Rode NT1A (or NT USB) – cheaper mic with high quality performance
- Neumann TLM – best large diaphragm mic
- Sennheiser MKH 416 – great for recording spaces with less soundproofing
Pop Filter
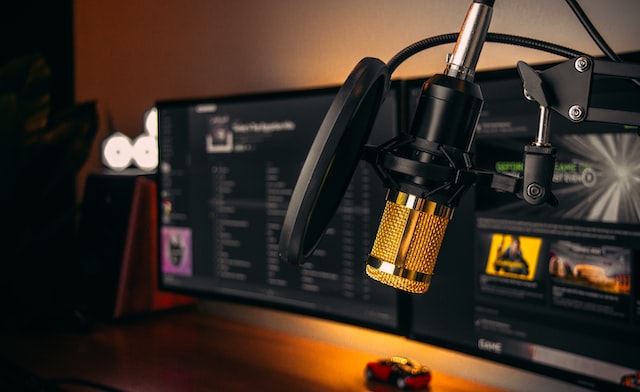
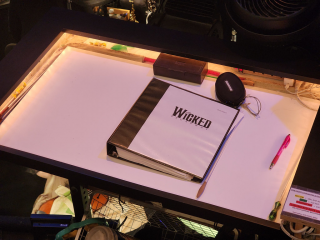
A pop filter is a tool that lessens the amount of unwanted mouth noises that a microphone will pick up. The filter blocks air that is pushed out from the mouth, and lessens the intensity of noise from when you hit hard consonants like P’s and D’s. These filters will help you to get a clean read of the script while speaking as naturally as possible. Pop filters are attachments that are typically attached to your microphone stand, like the image below.
Headphones
You can use any headphones that will plug into your equipment setup. Headphones are a great tool for live direction sessions and for improved listening to your audio. The best qualities to look for in a pair of headphones is audio quality (a clear sound reproduction across the entire frequency range), durability, comfortability, and an affordable price range.
When choosing your headphones, make sure that they are comfortable to wear for long periods of time and won’t restrict your performance. For example, if you’re recording lots of character work, you will want headphones with a long enough cable to allow for lots of body movement or physicalization. That being said, it’s always better to have corded headphones than bluetooth. Bluetooth headphones have a slight delay when sending the audio from your computer to your ears. This can lead to timing issues when recording to music or in a live directed session.
Interface
An interface is the piece of equipment that allows the sound to travel from your microphone to your computer. If you choose a USB mic, you will not need an interface. However, for all other mics, choosing an interface can help boost the overall quality of your recording. A quality interface will have a microphone preamp to help boost sound and phantom power, which provides a direct current voltage to power condenser mics, built into it. Some popular interfaces include:
- Motu M2/M4
- Focusrite Scarlett
- Behringer U-Phoria UMC202HD
- Steinberg UR22 MKII
- Audient ID14
Software
There are countless different options for software; it’s more about your comfort level with the software than anything else! With any software, there will be an initial learning curve. However, there are hundreds of resources online to get familiar with these programs. Check that the software is compatible with your computer operating system, mic, and interface hardware. Then, choose a software that is user-friendly for you and start exploring! Some examples of popular software for voice over recording include:
- Audacity (Free)
- GarageBand (Free – standard on all Macs)
- Pro Tools (~ $500 USD)
- Logic (~$280 USD)
- Adobe Audition (Subscription of ~$20 USD/month)
HOW TO FIND VOICE OVER JOBS
All the usual casting platforms such as Backstage, Spotlight, and Mandy feature job opportunities for voice over artists. Another great resource are freelance websites such as Fiverr and Upwork. There are also many agencies that specialize in voice over. Voice over artists may have an agent that specializes in voice over, or they may choose to have an agent that works in other mediums such as Film/TV or Theatre. If you’re new to the voice over world and looking to hone your skills, check out our article here about how to get started!


1 comment
Absolutely with you it agree. In it something is also I think, what is it excellent idea.